



Most mountain bike tool kits are bought as a set and carried as a bag. That works right up to the ride you did not plan for — the after-work loop, the borrowed bike, the day the pack stayed in the car.
This guide is organised the other way round: by the failures that actually end a ride, what each one needs, and where that tool can live so it is on the bike instead of in a bag you might not bring.
What a mountain bike tool kit actually has to cover
Four failures account for nearly every ride cut short:
| Failure | What it needs | Ride-ending without it? |
|---|---|---|
| Puncture that sealant will not close | Reamer, plug fork, plugs, inflation | Yes |
| Broken chain | Chain tool, matching quick link | Yes |
| Bolt loosens — stem, brake lever, seatpost | Hex and Torx bits, ideally a ratchet | Usually rideable but unsafe |
| Bolt overtightened on carbon | Torque control, 2–10 Nm | Damage rather than delay |
Everything else — spoke keys, bottle openers, spare bolts — is comfort. Get these four right first.

1. Tubeless punctures
A tubeless plug kit is the highest-value item in any modern MTB kit, because it turns a walk into a two-minute stop. Granite makes three, and they differ mainly in where they live and whether they inflate:
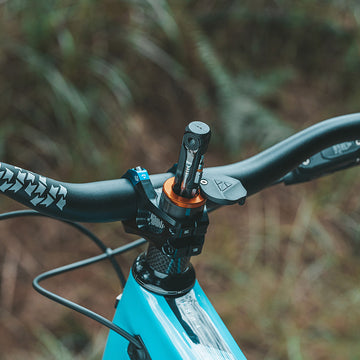
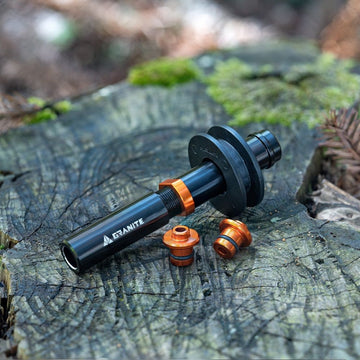
- Stash Tubeless Tire Plug Kit — a 30 g alloy capsule that lives inside the handlebar. Reamer, plug fork, and ten plugs (5 × 1.5 mm, 5 × 3.5 mm). Nothing to pack.
- Suture — the same repair set in a pocketable body, with a Presta valve core remover built into the base.
- Suture Aero — Suture plus an integrated CO₂ inflator, so plug and reinflate happen with one tool.
If you already carry a pump, the Stash or plain Suture is enough. If you race or ride remote and want the repair finished in one reach, Suture Aero is the one.


2. Broken chains
A chain tool without a matching quick link is half a repair, and an 11-speed link will not join a 12-speed chain — check what your bike runs and carry that one.
- Stash Chain Repair Tool Kit — chain tool and spare quick-link storage inside the handlebar or a hollow crank axle. Silent, and always there.
- Talon Tire Levers — reinforced composite levers with stainless tips that snap together into quick-link pliers, so one pocketable pair covers tyre removal and chain joining.
- Diverse 20 — if you would rather the chain breaker lived in your multi-tool, this one carries it along with a chain hook to hold the two ends together while you join them.


3. Bolts that need turning on the trail
This is where a multi-tool earns its keep, and where the difference between a folding tool and a ratchet shows up: stem bolts, caliper bolts and derailleur screws all sit in places where a straight key can only swing a few degrees.
- Stash RT — ratchet plus nine bits, stored inside the fork steerer. Needs a 23.5–27 mm steerer inner diameter and an opening at the bottom.
- Stash RCX — 8-in-1 bit set with a spoke key and Presta valve core remover, using an expander that replaces the star nut. This is the option for carbon road forks with no bottom opening.
- Diverse 10 / Diverse 20 — conventional pocket multi-tools at 65 g and 104 g if you would rather not modify the bike at all.


4. Torque, on carbon especially
Modern cockpits are the parts most often damaged by guesswork. The Rocknroll TQ covers 2–10 Nm with a reversible ratchet and ten bits — which is the band that stem faceplates, bar clamps, seatpost clamps and derailleur hardware live in.
Saddle rail bolts are usually 12–15 Nm and sit outside that range; those belong to a full-size torque wrench at home.

 Granite Rocknroll TQ Torque Ratchet Tool Kit
 Granite Rocknroll Mini Ratchet Tool Kit
 Granite Duet Hex Bit & Socket Ratchet Tool Kit
Where the kit lives
Storage is not an accessory category — it is what decides whether the kit is with you. Three approaches, and they combine:
- Inside the bike — Stash kits in the steerer, handlebar or crank axle. Nothing to remember, nothing to move between bags.
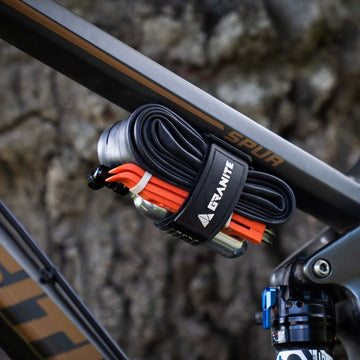
- On the frame — the Quiver tool roll (80 g, splash-proof) held by a Rockband or Rockband+ strap, for the spare tube and the things that do not fit in a tube.
- In a pack — fine for big days, unreliable for short ones.

 Granite Quiver Tool Roll
 Granite Rockband Mountain Bike Frame Carrier Strap
 Granite Rockband+ Mountain Bike Frame Carrier Strap
Building the kit, in order
- Plug kit first. Punctures are the most common ride-ender and the cheapest to solve.
- Then inflation. A pump or CO₂ — Suture Aero folds this into the plug kit.
- Then bits. Steerer kit if your fork allows it, pocket multi-tool if not.
- Then the chain. Chain tool plus a quick link that matches your speed count.
- Then torque, if you run carbon or adjust your own cockpit.
Buy in that order and the kit stays small. Bought as a set, it becomes a bag — and a bag is the thing that gets left behind.


